※ This page was translated using ChatGPT.
Please understand that there may be some awkward phrasing.
[Blender ver] 2025 #118 – How to Apply Feet Mesh and Tights
※ This tutorial assumes that you already know the basics of rendering and working with Blender clothing. (Any Blender version works!)
※ For instructions on using Blender clothing, please refer to this video.
※ If you know an easier method, feel free to share ❤️
1. Replacing the Feet Mesh
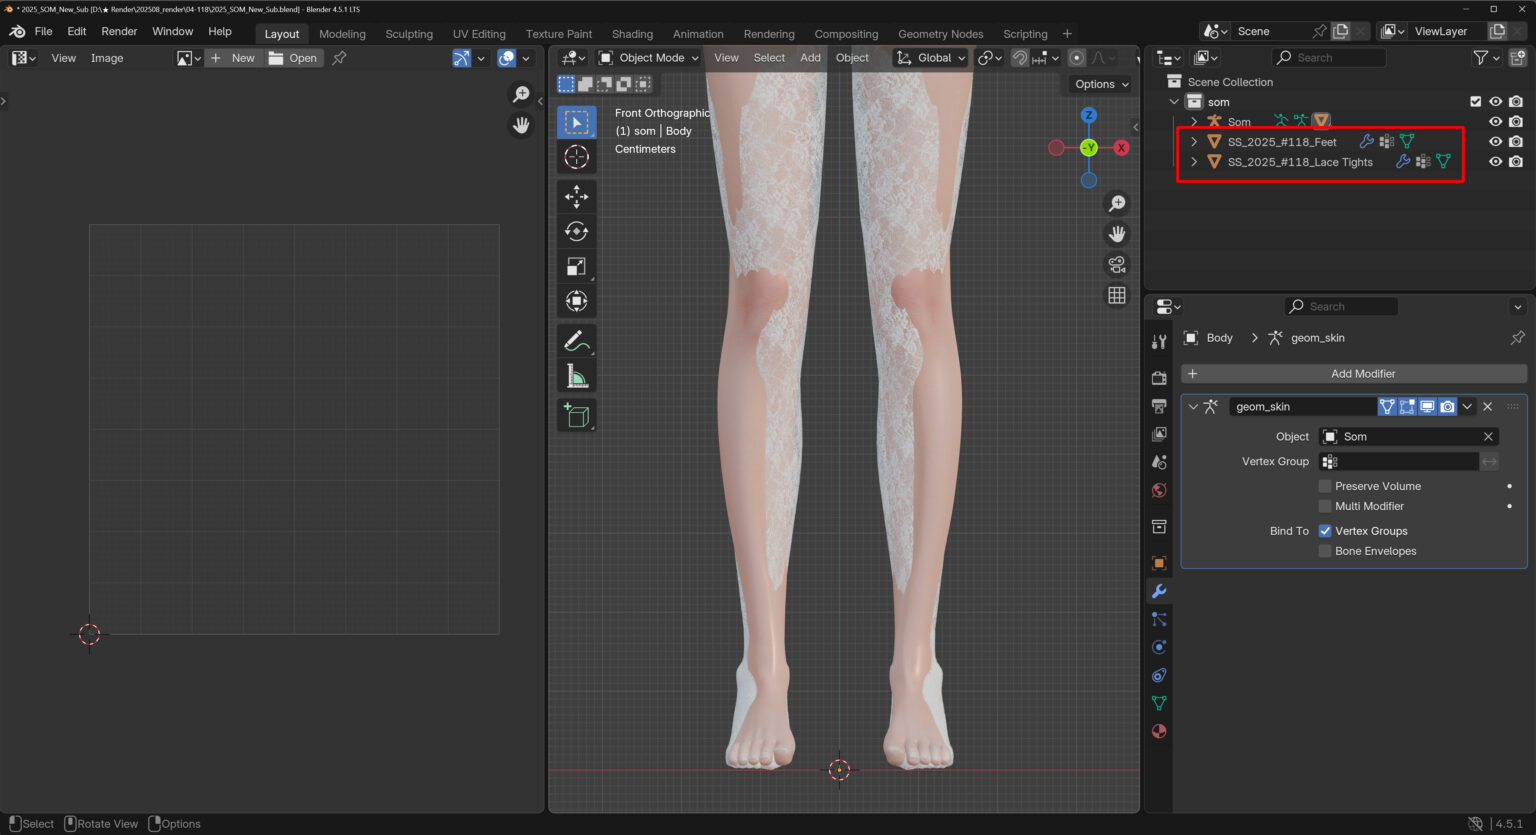
Append the required meshes — the feet mesh and the tights.
Select your Sim’s body mesh and switch to Edit Mode.
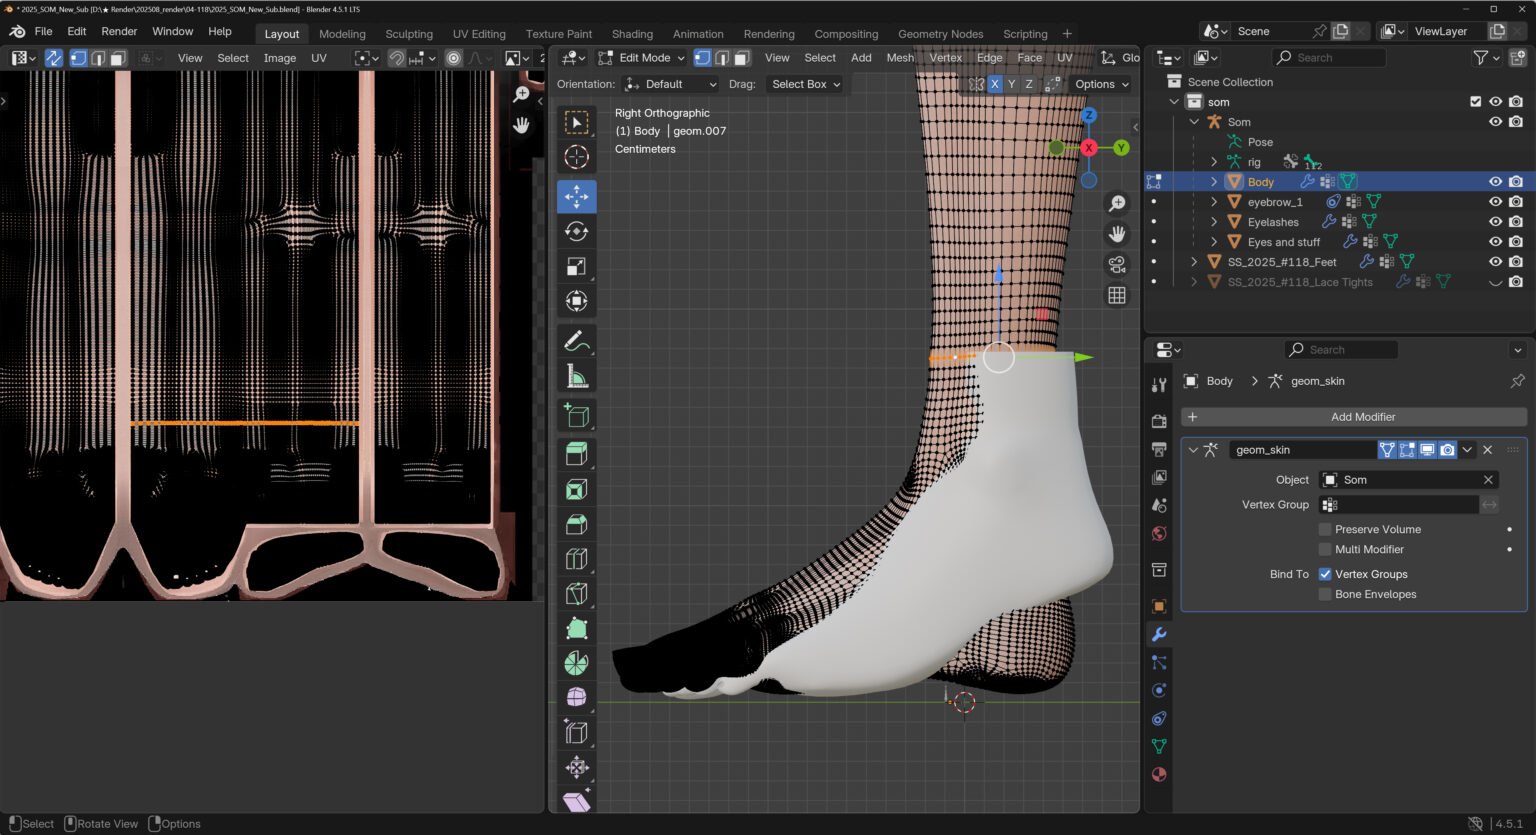
Hold Shift + Alt and click on an edge loop in a similar position to the mesh you want to replace (do this on both sides).
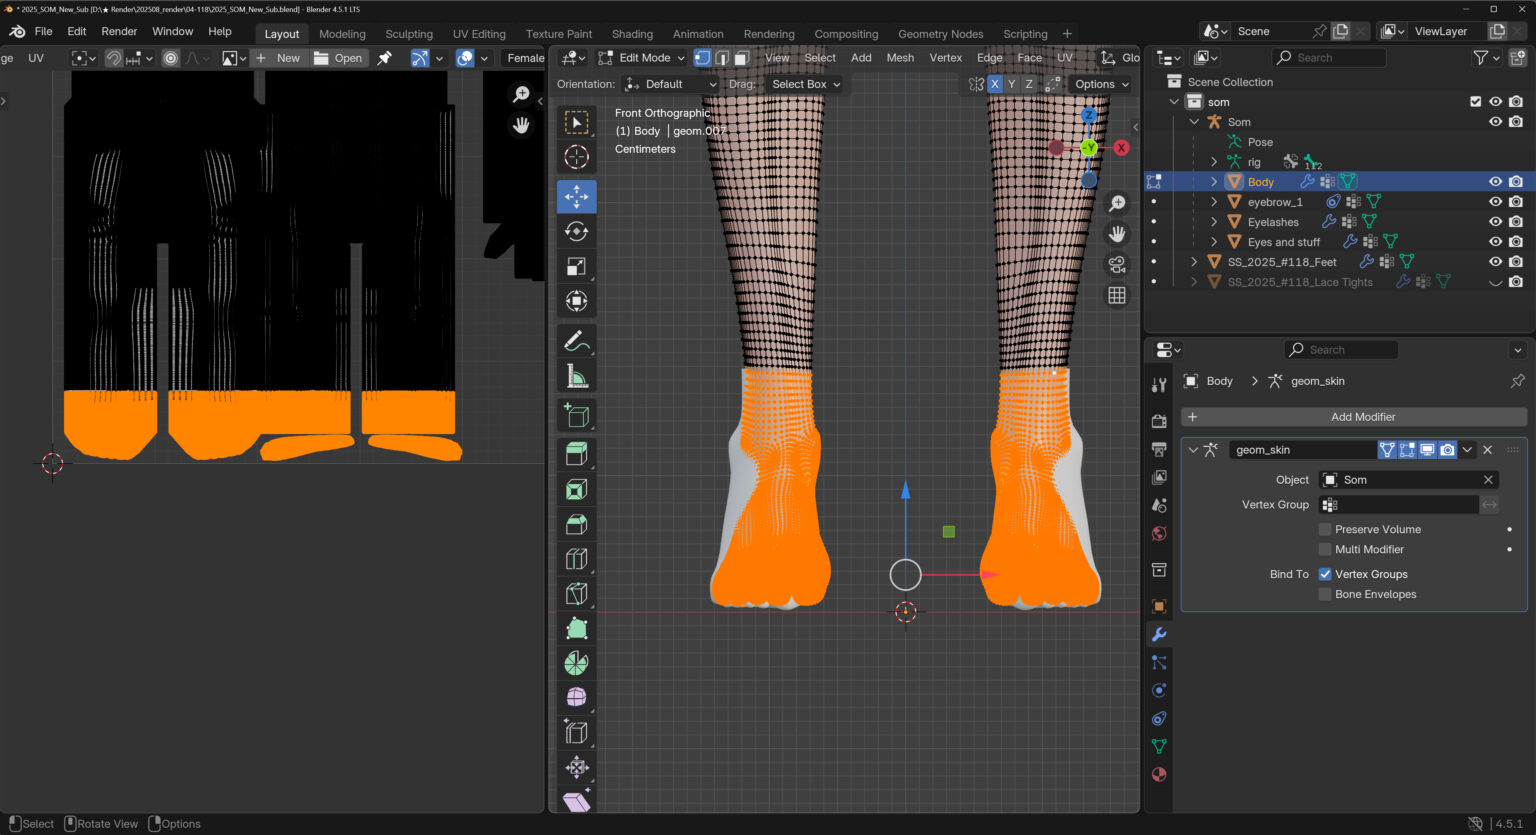
Select the area below the yellow line.
(The easiest way is to drag below the yellow line in the UV Editor.)
Go to Delete → Face.
When deleting by Face, only the selected area will be removed.
When deleting by Vertices, it will remove one extra row, so keep that in mind.

Once deletion is complete,
we’ll unify the UV Map names of the body mesh and the feet mesh.
Open the Data tab, go to the UV Maps menu, and check the UV map name of your body mesh.
In my case, it’s named som.
Now, select the feet mesh and rename its UV map to match exactly.
For me, that means changing it to som.
(Make sure to match it to your own body mesh’s UV map name!)
If the mesh has multiple UV maps, keep only the top one and delete the rest by clicking the minus (-) button.

In the Material tab in Blender, apply the skin material to the feet mesh.
Click the highlighted slot at the top and select the same material used on the body mesh.
If the skin appears black or transparent, the UV map name is incorrect.
Review the steps above and rename the feet mesh’s UV map to match the body mesh exactly.

Now, let’s connect the trimmed areas.
First, click the arrow next to the Show Overlays button at the top and enable Wireframe.
You’ll notice the difference in face size between the body mesh and the feet mesh.
To make the feet mesh match the body mesh more closely, apply a Subdivision modifier:
Modifier → Add Modifier → Generate → Subdivision Surface.

The feet mesh has Subdivision 1 applied by default.
It’s best to match the Subdivision level of the feet mesh to the same number used on your body mesh.
If you’re unsure, simply adjust it so the face size is as close as possible.
Having similar face sizes between the feet mesh and the body mesh will make it much easier to merge them.
(Of course, even if the sizes don’t match perfectly, you can still merge them—so keep following the tutorial!)

Next, select the body mesh and switch to Sculpt Mode.
Use Grab to adjust the position so that the end of the body mesh aligns as closely as possible with the feet mesh.
(Your icon may look different from mine—search by name if needed!)
Now, select both the body mesh and the feet mesh, then press Ctrl + J to join them.
※ If you don’t mind a slight misalignment or the ankles not being fully visible, you can stop here. From a distance, it may not be noticeable.
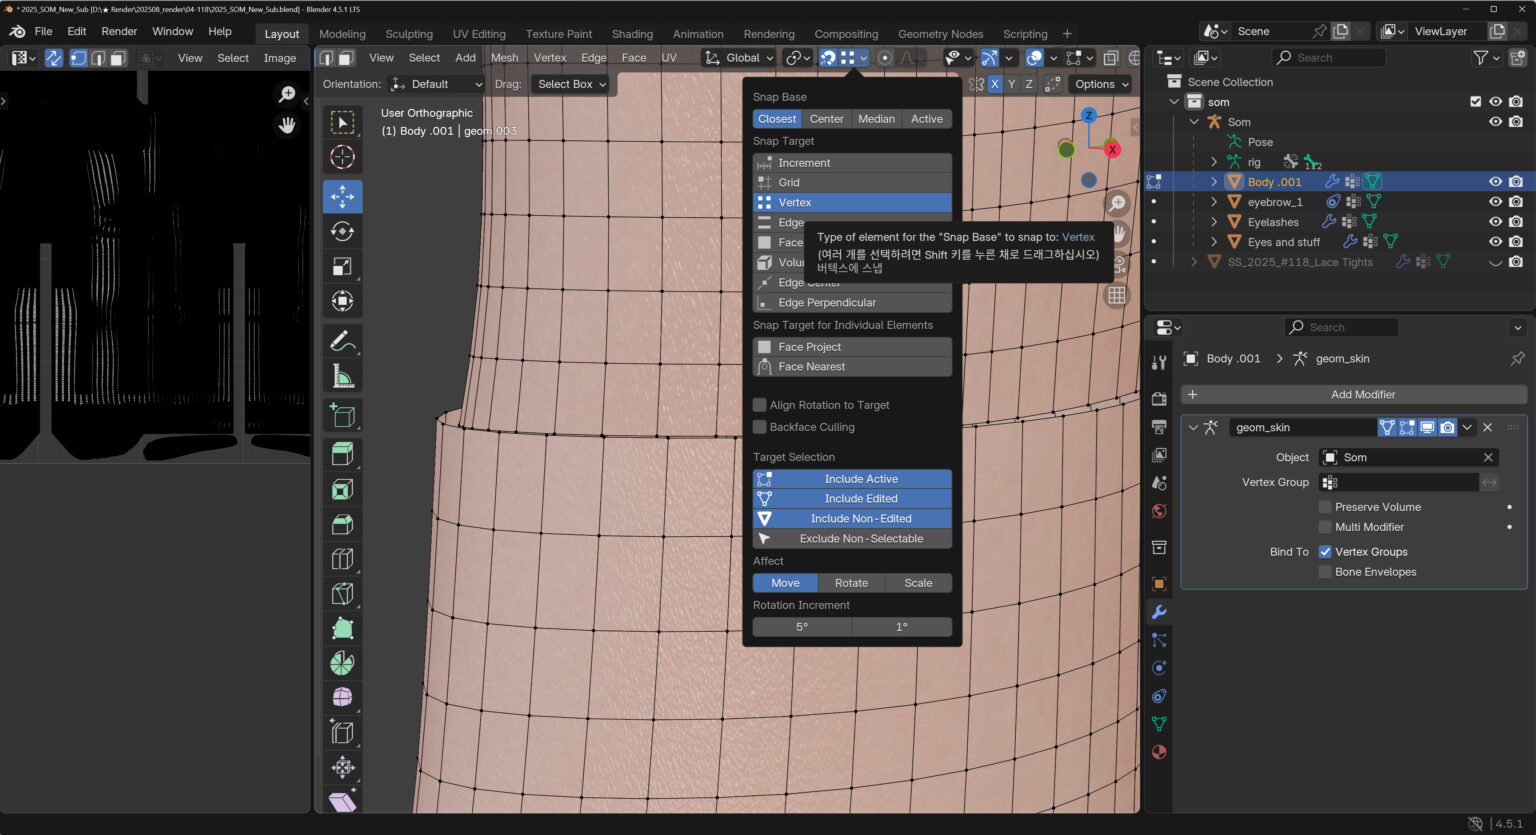
Next, go into Edit Mode, enable Snap (the magnet icon) at the top, then open the menu next to it and set it to Vertex.
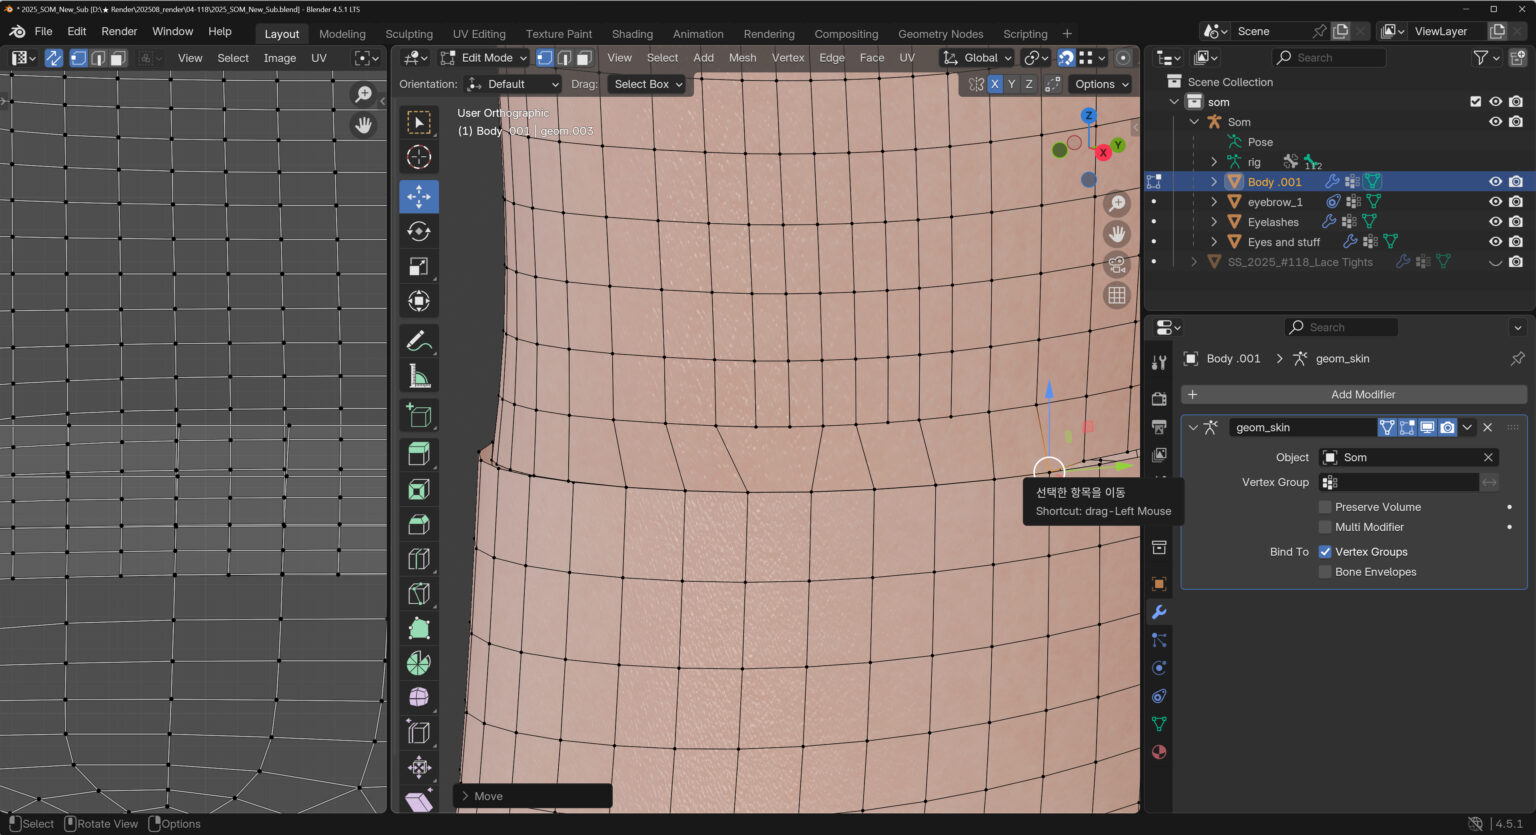
Now, we’ll move the end vertices of the body mesh to align with the end vertices of the feet mesh.
Select a vertex from the body mesh, press G, and move it toward a vertex on the feet mesh—
it will snap perfectly into place.
>> See video reference <<
If the alignment is already perfect, you can skip this step!
However, sculpted body meshes may sometimes have vertices that don’t align well, or the vertex counts may differ.
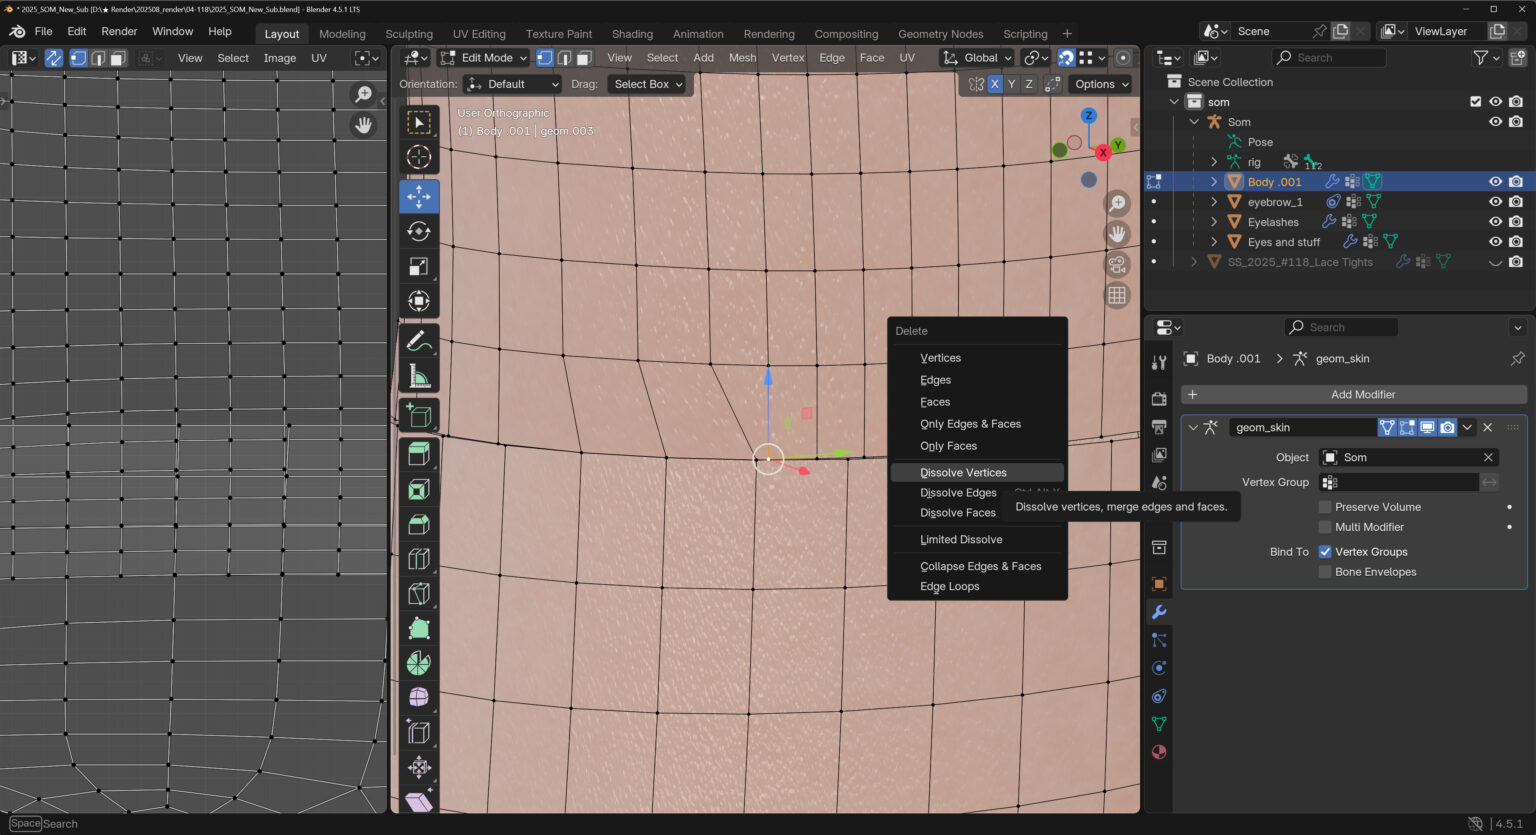
In that case, you can simply delete those specific vertices before proceeding.
Select the vertices you want to remove, then go to Delete → Dissolve Vertices.
epeat this process for both feet until they’re complete!
(Once you’re done, be sure to turn off the Snap button)
Once all the vertices are aligned, you’ll need to merge them.
Avoid merging the entire mesh at once, as other nearby vertices could merge unintentionally.
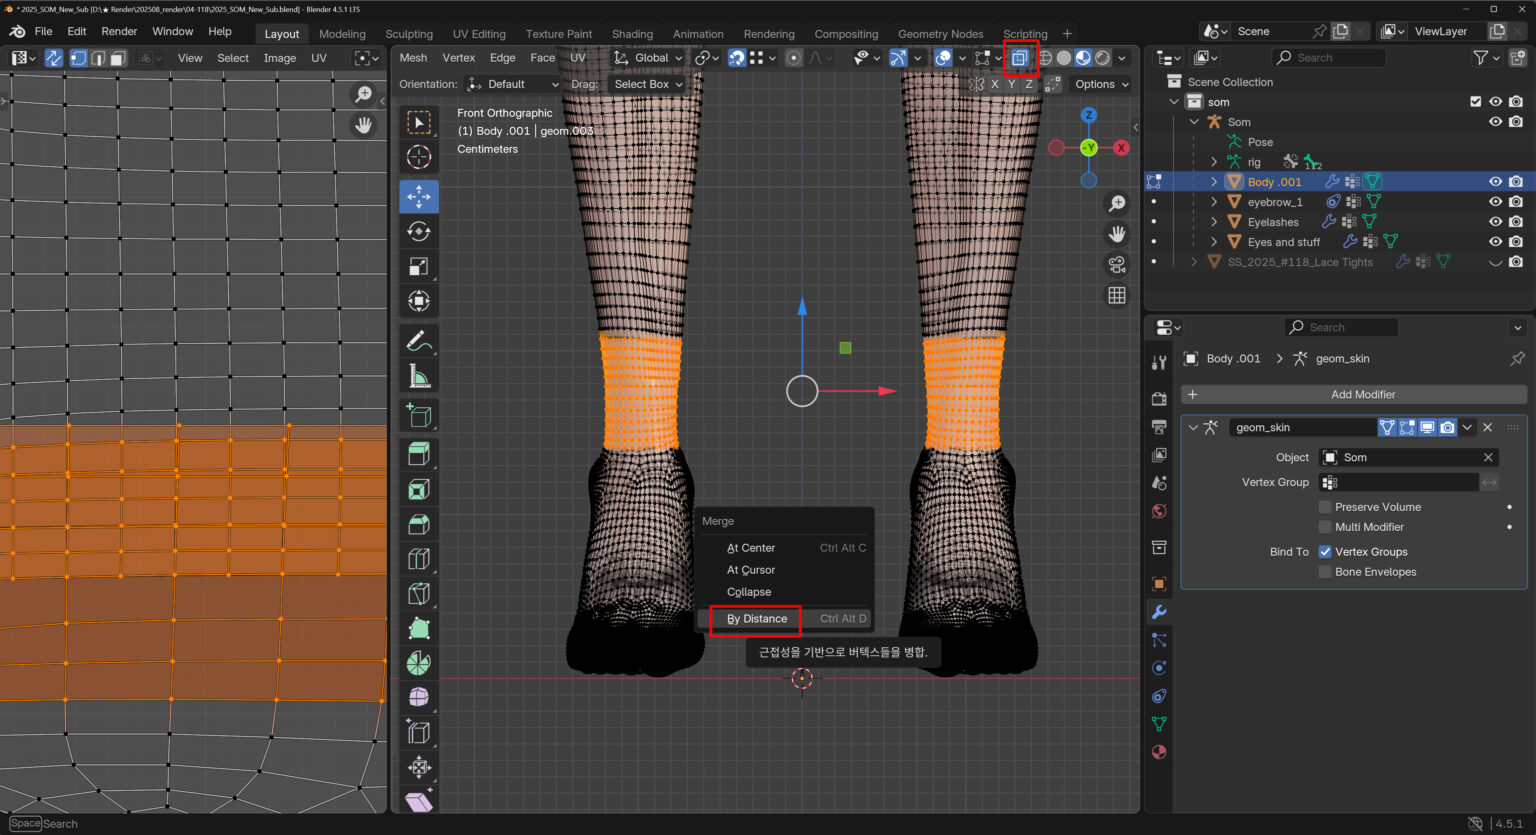
First, enable the X-ray button at the top so you can see through and select vertices from both sides.
Then, drag to select the specific area you want to merge.
Press M to open the Merge menu, and choose By Distance.
(This will merge all vertices within the default set distance.)

Finally, in Sculpt Mode, use the Smooth brush to soften the seam where the meshes were joined.
Reduce the brush size and strength, then click along the seam to blend it in.
And you’re done!
This method can be used not only for feet meshes but also for hands, heads, and more.
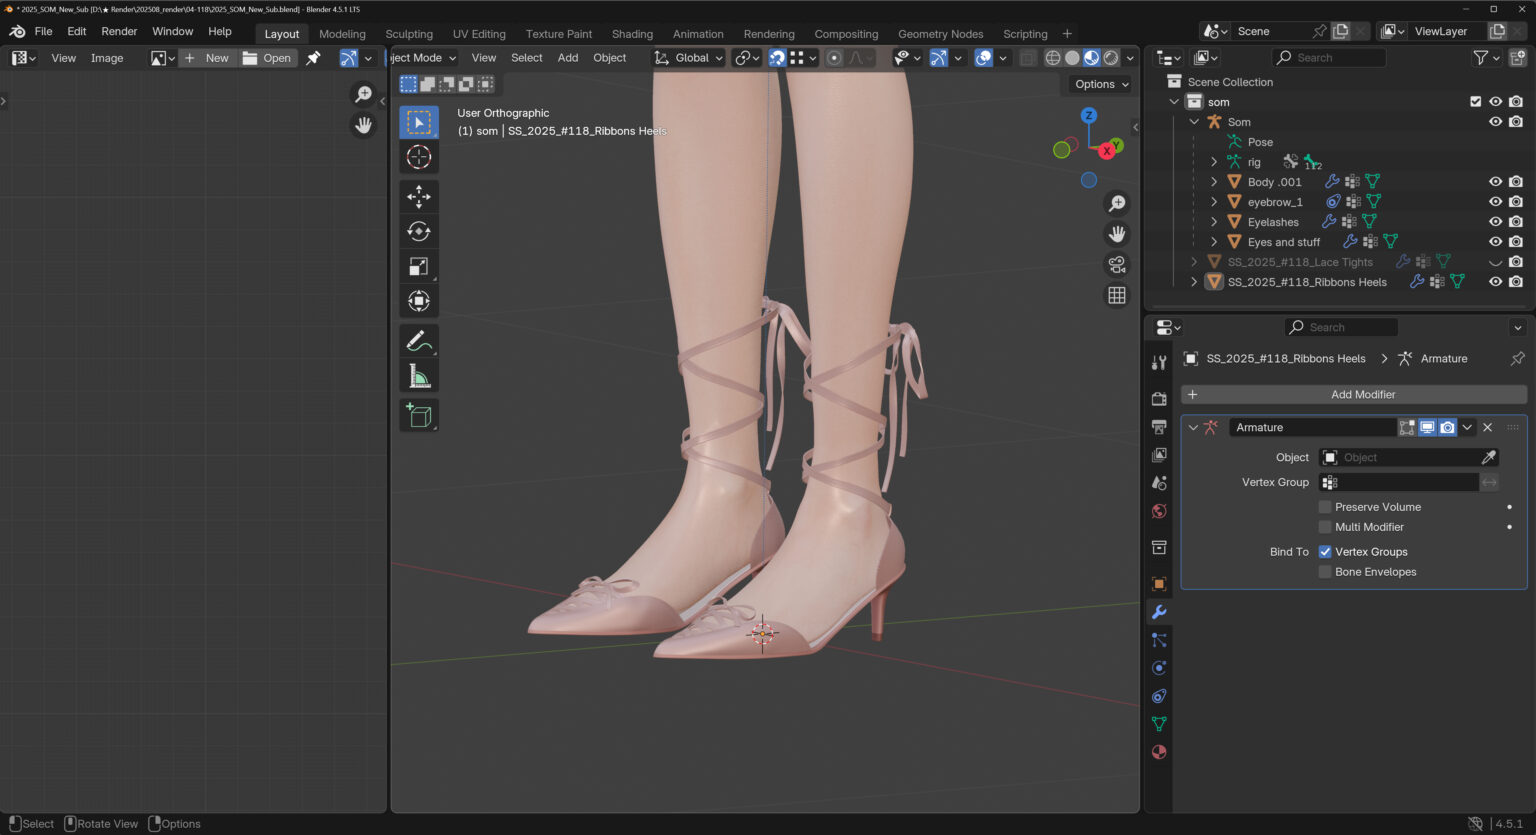
Most of the heels I’ve created recently already include a feet mesh.
If sculpting the feet to fit the shoes has been difficult for you, give this method a try!
2. Applying Tights
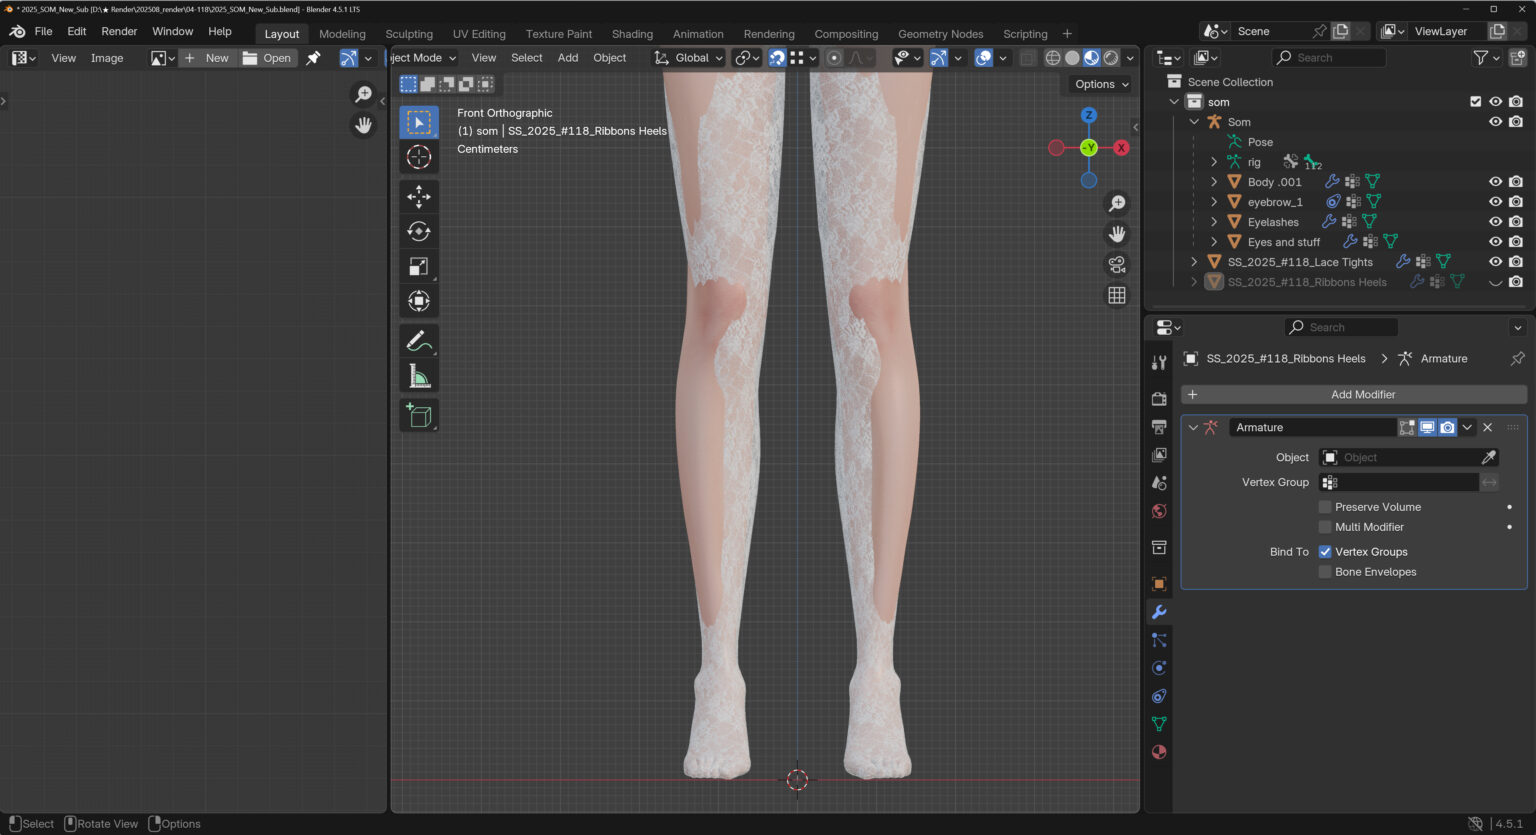
The tights mesh included in the file was created by applying Subdivision to the default body, so it’s not fully compatible with most Sims’ legs.
This mesh was added solely to include the material as a reference.
Normally, you could extract the tights texture using Sims 4 Studio and overlay it onto the skin in Photoshop.
However, since this sits flush against the skin, it doesn’t look very realistic.
In this tutorial, I’ll show you a different method—duplicating your body mesh, offsetting it slightly, and then changing its material to tights.
*You can use the same approach for other tights as well!
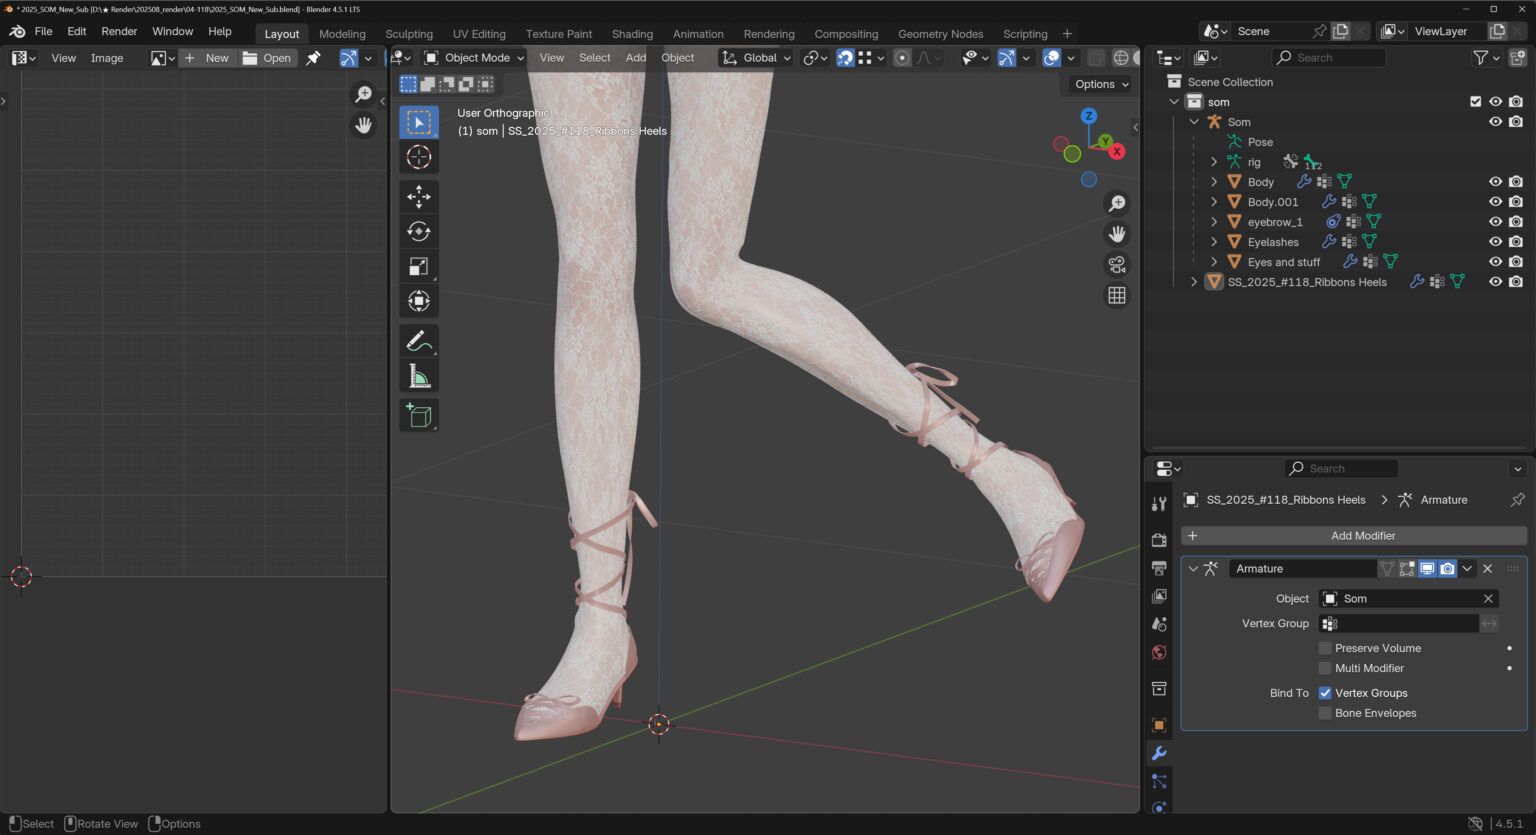
Delete SS_2025_#118_Lace Tights.
(Since the material is already saved in the Blender file, you won’t need it again once it’s been imported.)
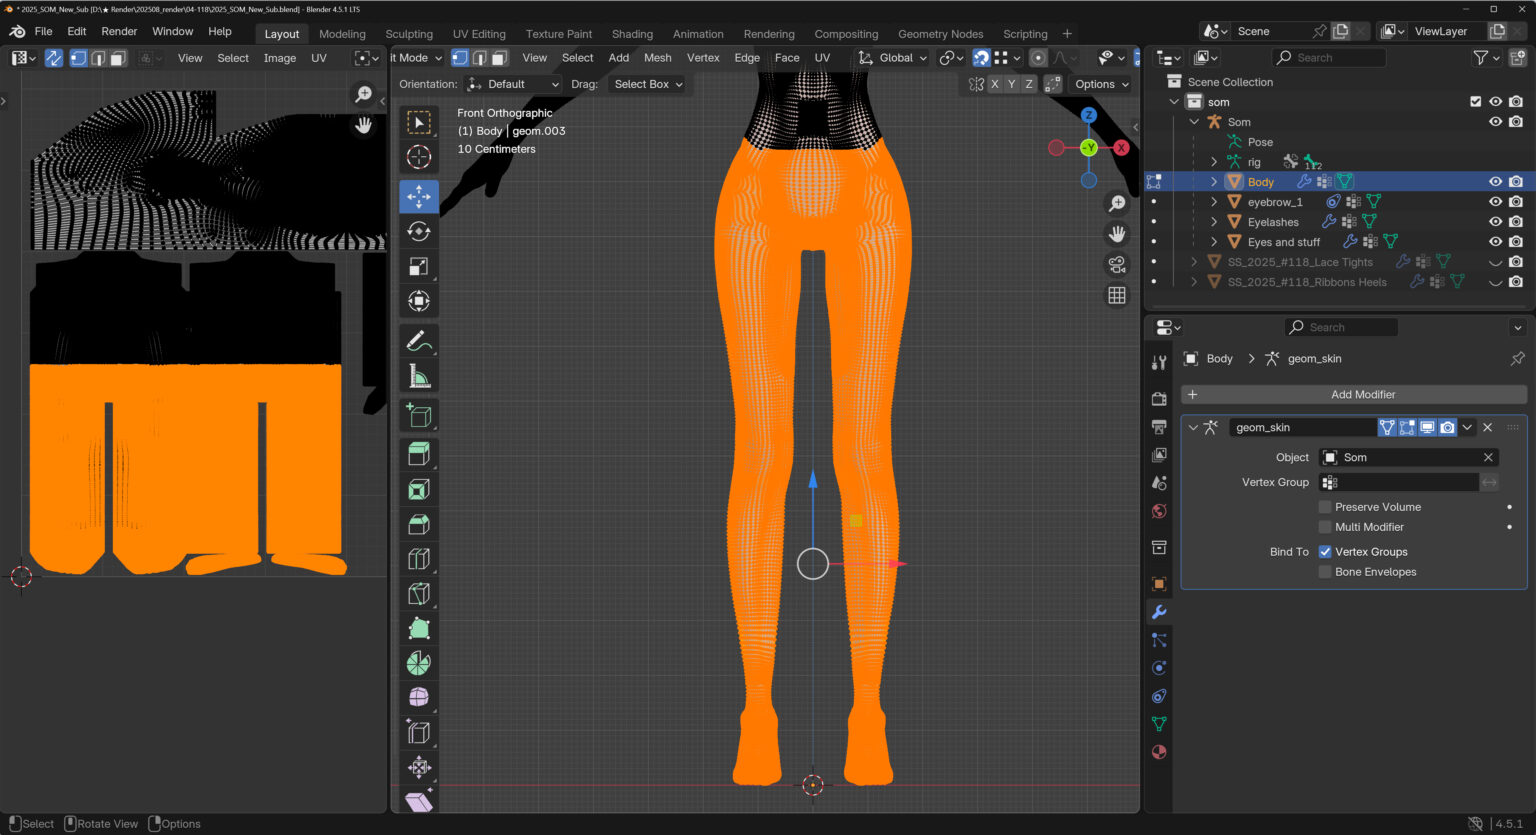
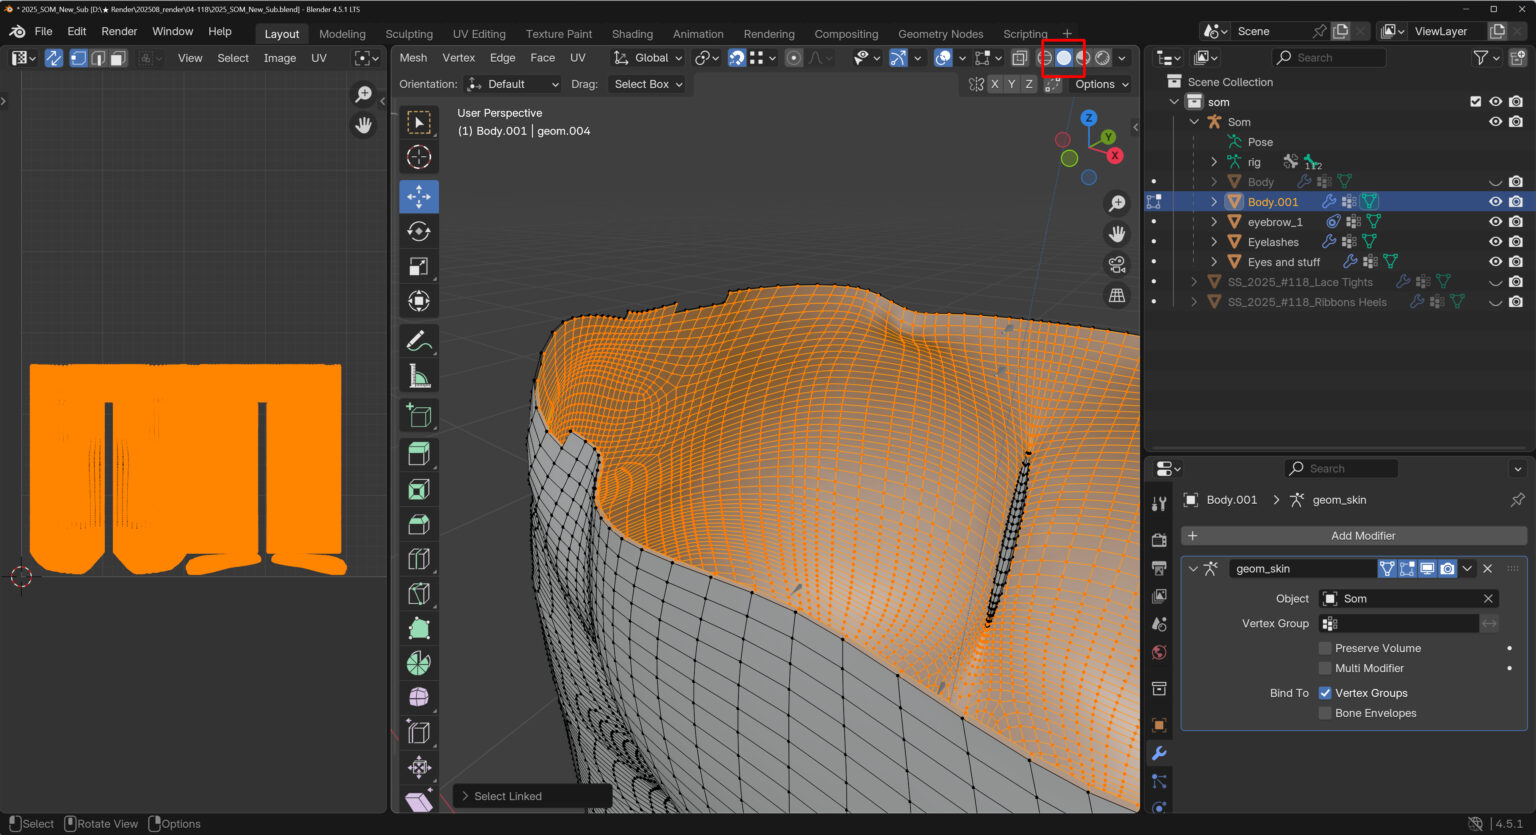
Next, select the area that will become the tights in the UV Editor.
(If you’re selecting in the 3D Viewport, make sure to enable the X-ray button first!)
After selecting, press Ctrl + D → Esc → P → Selection.
(This process duplicates the selected mesh with Ctrl + D and then separates it using P → Selection.)

It should now be separated like this!
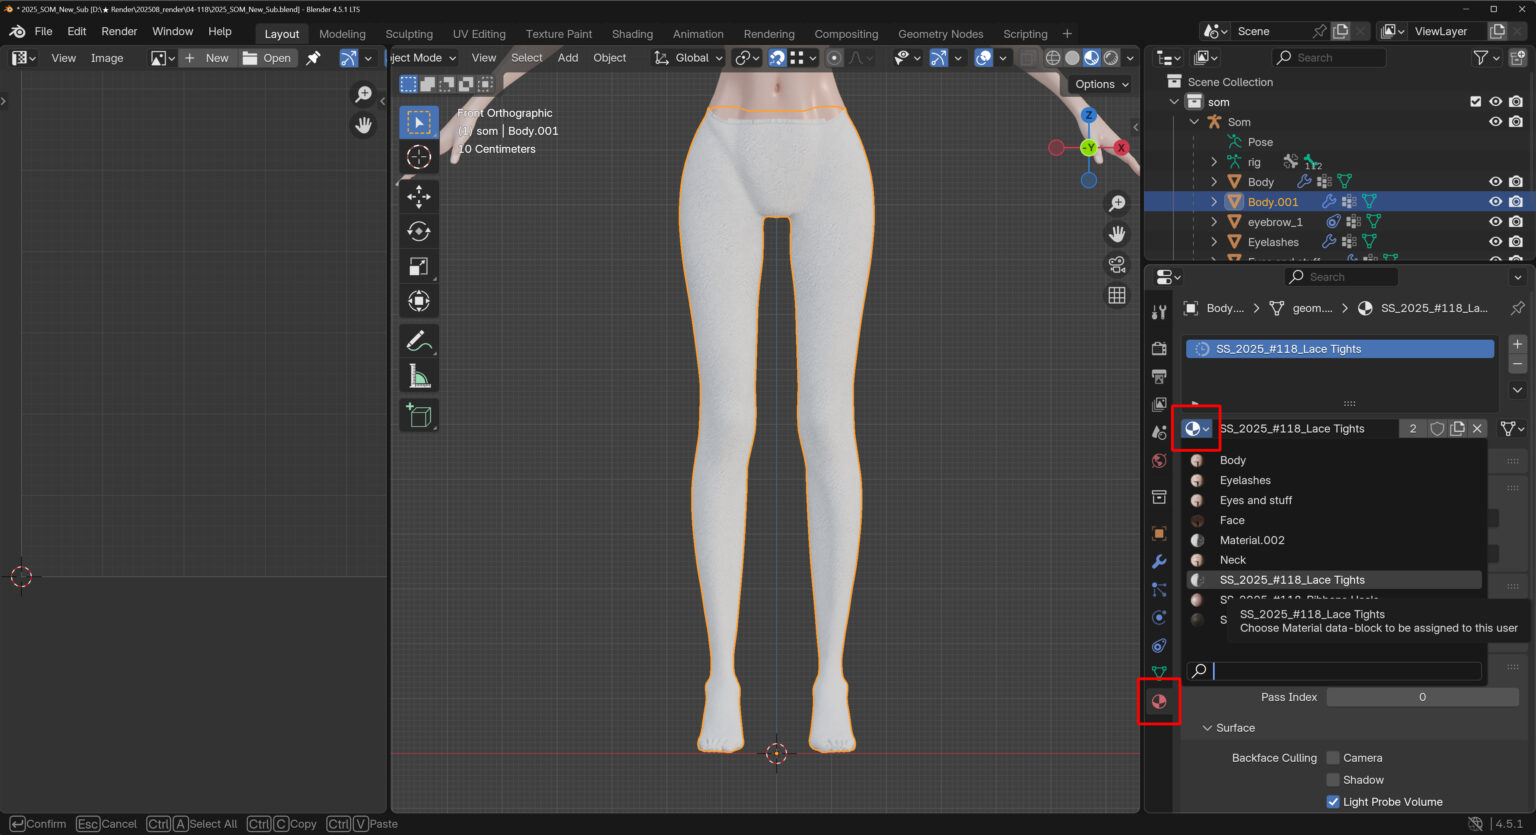
Change the material of the separated body mesh to the tights material.
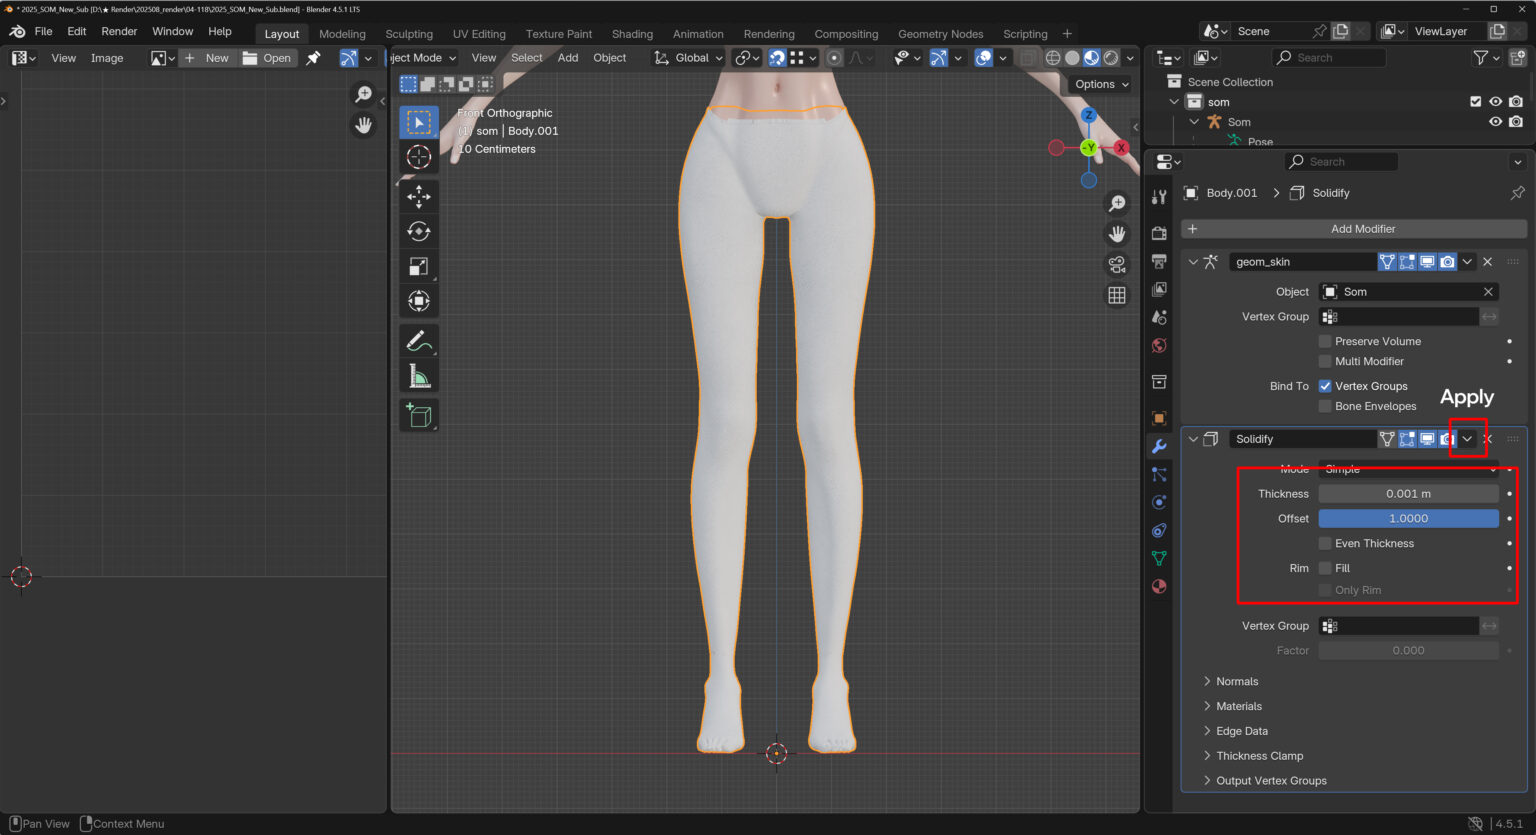
Now, use Solidify to make the mesh slightly larger than the body mesh.
Modifier → Add Modifier → Generate → Solidify
Match the settings exactly as shown!
※ Be sure to uncheck Fill.
Once the values are correct, click the arrow button and select Apply.
Hide the body mesh by turning off its eye icon, then switch to Edit Mode for the tights mesh.
Select the inner mesh with L and delete it.
(For better visibility, set the Viewport Shading to Solid at the top.)
Now the transparency should display correctly, and since we used the body mesh, there won’t be any clipping or distortion even when posing!
You can use the same method for lace gloves and similar accessories.
If you run into any issues or have questions, feel free to send me a message on Patreon or a DM on Instagram!